DIY Photo Wall Tile Ideas – Create Stunning Home Decor in 2023
Are you ready to transform your living space with stunning, personalized photo wall tiles? Get ready to unleash your creativity and dive into the world of DIY photo wall tile ideas! It’s an affordable and customizable way to decorate your home with your favorite memories. Let’s get started!
Short Summary
- Create unique home decor with DIY photo wall tiles!
- Select photos, print memories, and choose materials to create a stunning gallery wall display.
- Explore creative layouts & installation tips for lasting memories that make the perfect gift!
Creating Your Own Photo Wall Tiles
Imagine turning your Instagram, Facebook, or even desktop photos into eye-catching custom photo tiles for your home. With various materials and designs available, there’s no limit to the creative possibilities. From Storyboards Photo Tiles with their hassle-free adhesive designs, to ceramic tiles that double as coasters and trivets, your creative juices will be flowing in no time! So, are you ready to create your own unique gallery wall?
Before you dive into the world of custom wall art, there are three essential steps to consider: selecting photos, printing photos, and choosing materials. Let’s explore these steps in more detail!
Selecting Photos
Choosing the right photos for your DIY photo wall tiles is crucial for achieving a cohesive and visually appealing display. Start by considering the theme, color scheme, and overall aesthetic of the space you’re decorating. Do you want a vibrant, colorful display or a classic black and white look? Keep in mind that complementary colors can create a visually pleasing effect, while black and white photos provide a timeless look.
Once you’ve settled on a theme and color scheme, it’s time to select the photos you’d like to showcase. Simply upload high-quality images that represent different stages of life, personal milestones, or even your favorite travel destinations. The possibilities are endless, so have fun and let your creativity shine with one photo or many!
Printing Photos
Now that you’ve selected your photos, it’s time to print them! To achieve the best results, ensure that you’re using high-quality images and that they’re the right size to fit your chosen materials, such as ceramic or aluminum tiles. If you’re going for a DIY approach, you can use mod podge to adhere your photos to the tiles. This will ensure that your prints stay securely attached and look fantastic.
Keep in mind that the quality of your prints will have a significant impact on the overall appearance of your photo wall tiles. Don’t skimp on this step! Invest in high-quality prints that will truly showcase your favorite memories and make your gallery wall stand out.
Choosing Materials
With your photos selected and printed, it’s time to choose the perfect materials for your photo wall tiles. There are several options available, including ceramic, aluminum, and foam. Each material offers its own unique benefits and aesthetic appeal, so consider your personal preferences and the overall look you’re aiming for.
Ceramic tiles are heat resistant and water-resistant, making them a durable option for various environments. Aluminum tiles offer long-term durability and incredible photo clarity, while foam photo tiles are ultra-lightweight and can be placed almost anywhere without causing wall damage. Consider the pros and cons of each material and select the one that best suits your needs and style.
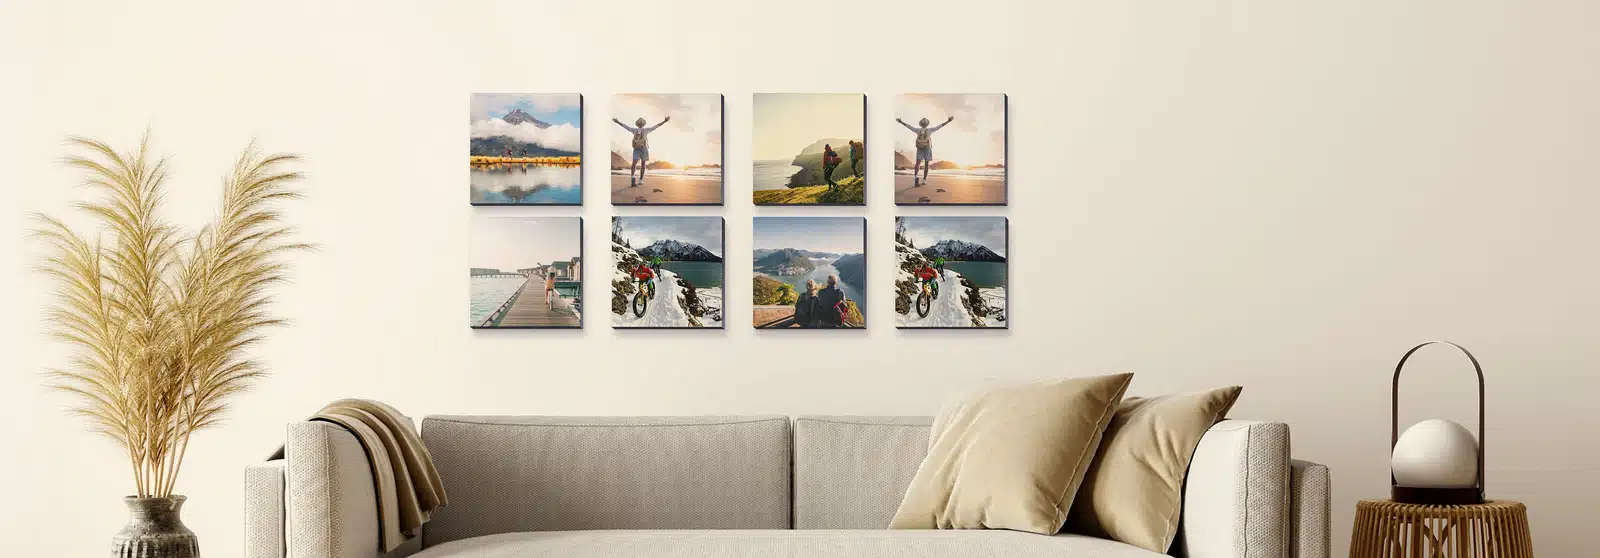
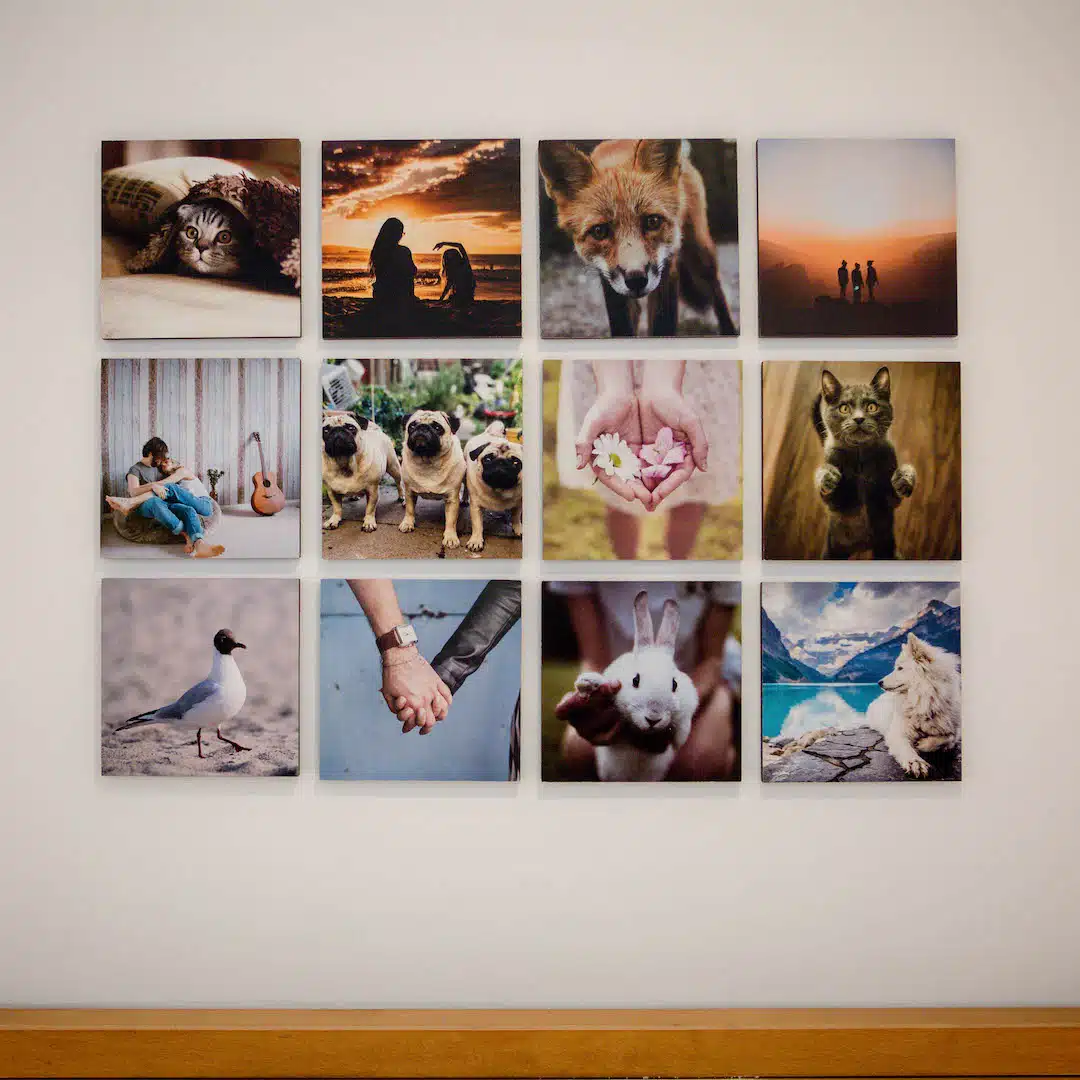
Creative Photo Tile Layouts
Once you have your photo tiles ready, it’s time to decide on a layout that will enhance the visual impact of your gallery wall. The possibilities are endless, with options like symmetrical grids, asymmetrical arrangements, and themed layouts. Each layout style offers its own unique charm and appeal, so choose the one that best reflects your personality and the overall look you want to achieve.
Not sure which layout to choose? Fear not! We’ve got you covered with some creative photo tile layout ideas that will get your creative juices flowing and help you create a stunning gallery wall that’s sure to impress.
Symmetrical Grids
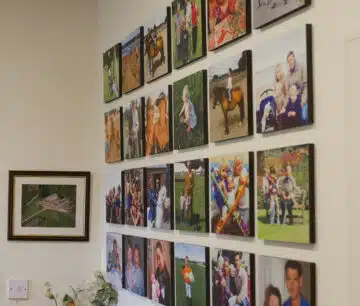
If you’re a fan of clean, organized looks, then a symmetrical grid layout is perfect for you. This layout creates a sense of balance and harmony in your space, offering a visually pleasing and well-structured display. A simple grid pattern with evenly-spaced rows and columns is an elegant option that works well with a variety of photo styles and themes.
When creating a symmetrical grid layout, it’s crucial to ensure that your photo tiles are evenly spaced and aligned. This will create a polished, professional look that’s sure to make your gallery wall stand out. Remember, attention to detail is key when it comes to achieving the perfect symmetrical grid layout!
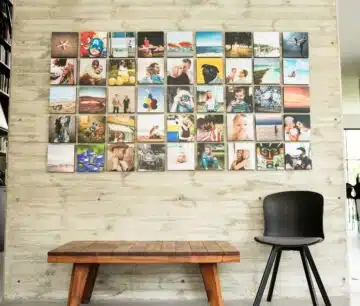
Asymmetrical Arrangements
For those who prefer a more dynamic and unique display, asymmetrical arrangements are the way to go. These layouts add personality and visual interest to your gallery wall, creating an eye-catching and memorable display. Asymmetrical arrangements can include a mix of photo sizes, shapes, and even different types of wall art, such as sculptures or decorative plates.
To create a visually stunning asymmetrical arrangement, consider incorporating textures and three-dimensional details to add depth and interest to your gallery wall. The key is to strike a balance between order and chaos, ensuring that your display remains visually appealing and harmonious despite its asymmetrical nature.
Themed Layouts
Themed layouts offer a unique way to tell a story or evoke a specific mood through your photo wall tiles. Whether it’s a chronological display of family memories, a collection of travel photos, or a gallery dedicated to a specific theme, these layouts can help you create a truly personalized and visually engaging gallery wall.
When designing a themed layout, consider the following:
- The size and shape of your photos
- The colors and textures of your materials
- The overall composition of your display
- Adding captions or quotes to your photos to create a more personal and meaningful display
With a little creativity and planning, your themed layout will become a cherished focal point in your home.
Innovative Photo Wall Tile Ideas
Ready to take your photo wall tile game to the next level? Innovative picture tiles ideas can help you create a truly unique and memorable gallery wall that reflects your personality and style. From seasonal displays to memory lane themes and artistic expressions, there’s no shortage of inspiration to help you create the perfect photo wall tile display.
Don’t be afraid to think outside the box and experiment with different ideas and concepts. The sky’s the limit when it comes to transforming an empty wall into a gallery wall that’s truly one-of-a-kind. So let your creative juices flow and start exploring these innovative photo wall tile ideas – you might just stumble upon a great idea!
Seasonal Displays
Seasonal displays offer a fun and dynamic way to update your photo wall tiles throughout the year. Showcase special moments and holiday memories by swapping out your tiles to match the changing seasons. This not only keeps your gallery wall fresh and interesting, but also allows you to relive your favorite memories all year long.
To create a seasonal display, follow these steps:
- Choose photos that represent different holidays, celebrations, or seasonal activities.
- Mix and match your tiles to create a visually engaging display that captures the essence of each season.
- With a little planning and creativity, you’ll have a gallery wall that’s always in season!
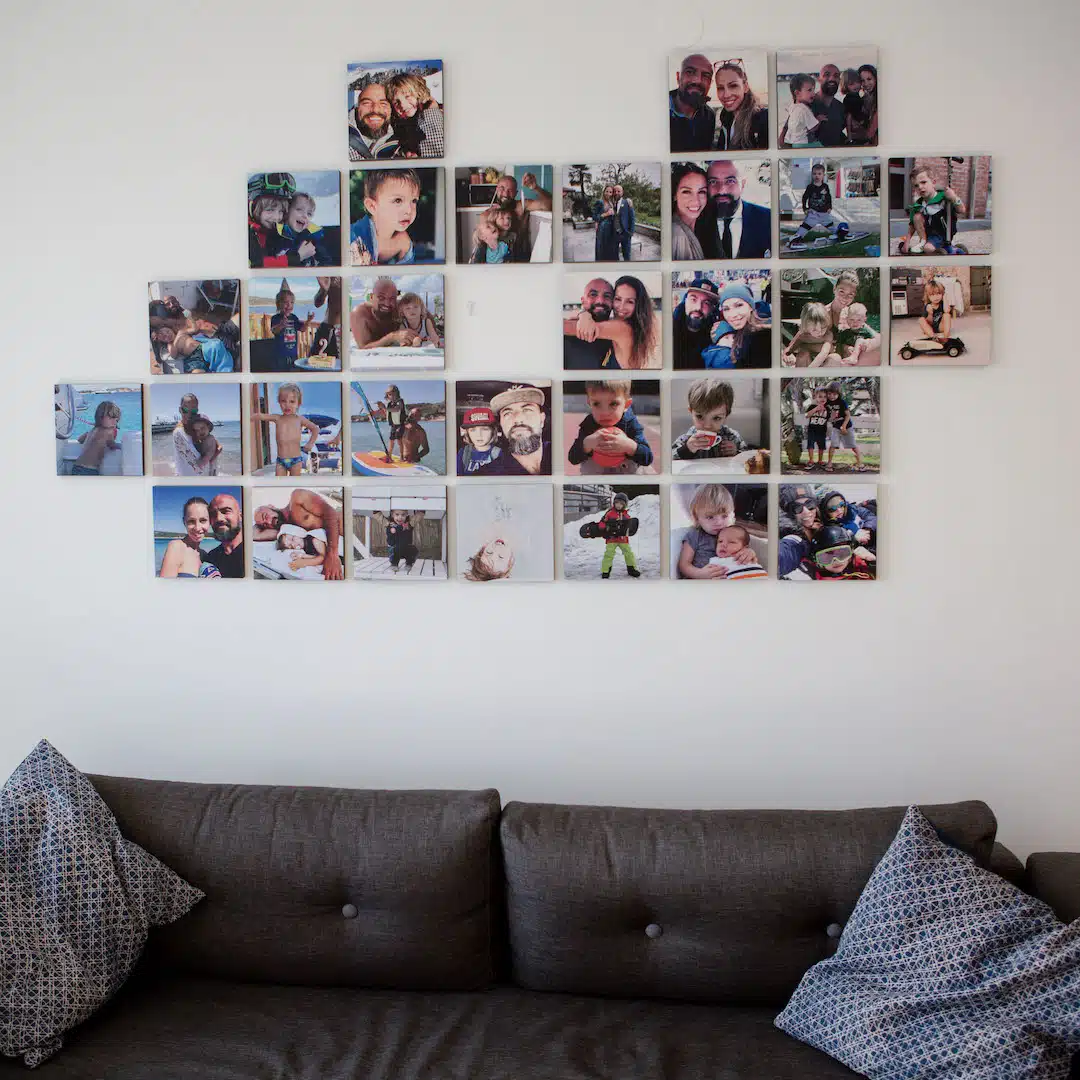
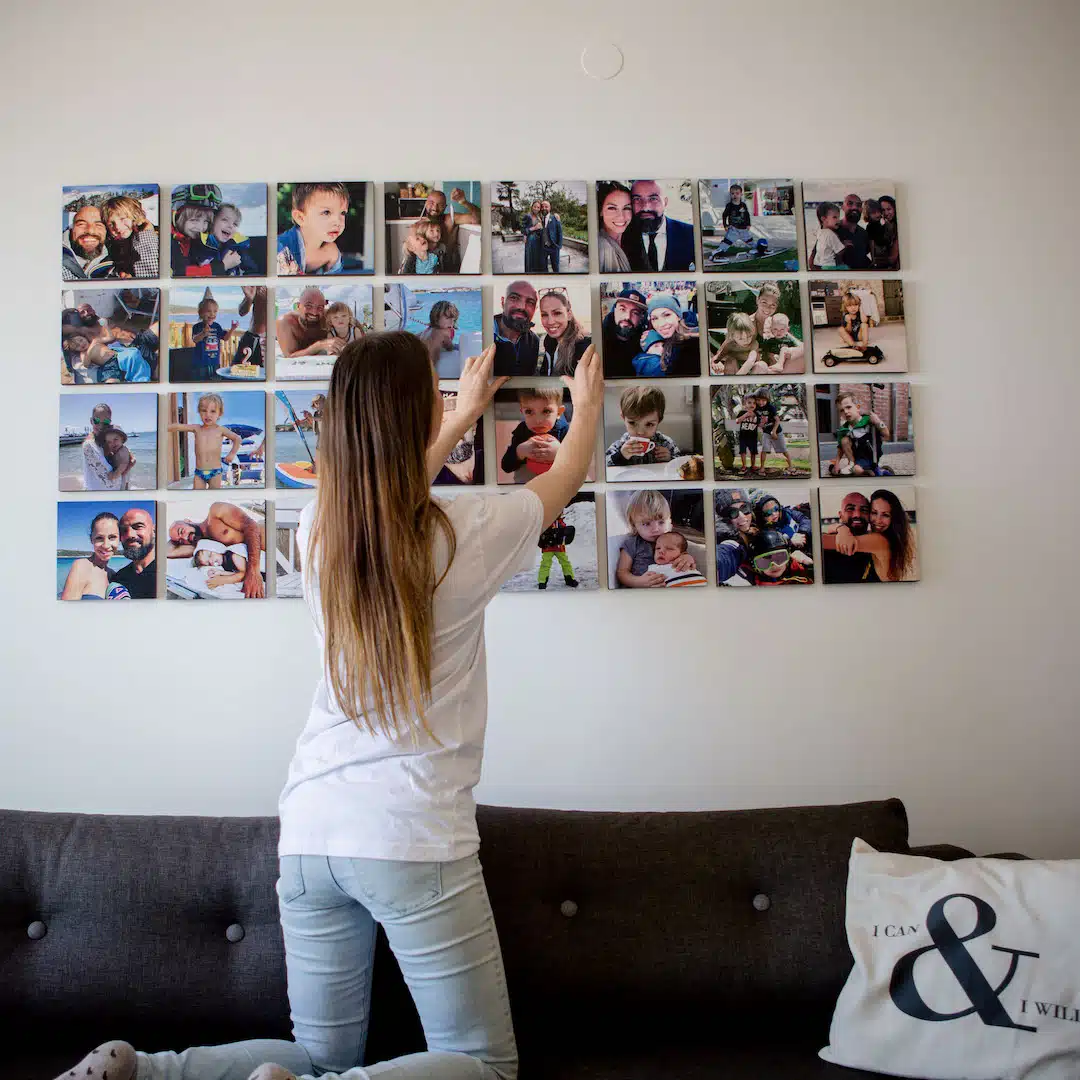
Memory Lane
Take a trip down memory lane with a gallery wall that features a photo gallery from various stages of life and personal milestones. This nostalgic and comforting theme is perfect for those who want to showcase cherished memories and celebrate the journey of life. From childhood photos to wedding pictures and everything in between, a memory lane themed gallery wall is a beautiful way to honor the past.
To create a memory lane theme, start by selecting photos that represent different stages of life and personal milestones. Consider using photos from:
- Childhood
- Family vacations
- Graduations
- Weddings
- Other special occasions
Arrange your photo tiles in chronological order to tell a visual story of your life’s journey, and enjoy the trip down memory lane!
Artistic Expression
Embrace your inner artist and create a photo wall tile display that showcases your unique style and creativity. Artistic expression encourages individuality and allows you to incorporate unique shapes, patterns, and mixed media elements into your gallery wall. From bold abstract designs to vibrant geometric shapes, the possibilities are endless when it comes to creating a visually stunning display that reflects your artistic vision.
To incorporate artistic expression into your photo wall tiles, think beyond traditional photos and explore different mediums, textures, and styles. Consider incorporating paintings, drawings, or even fabric swatches into your display to create a truly unique and visually captivating gallery wall. Remember, there are no rules when it comes to artistic expression, so let your imagination run wild and create a display that’s truly one-of-a-kind.
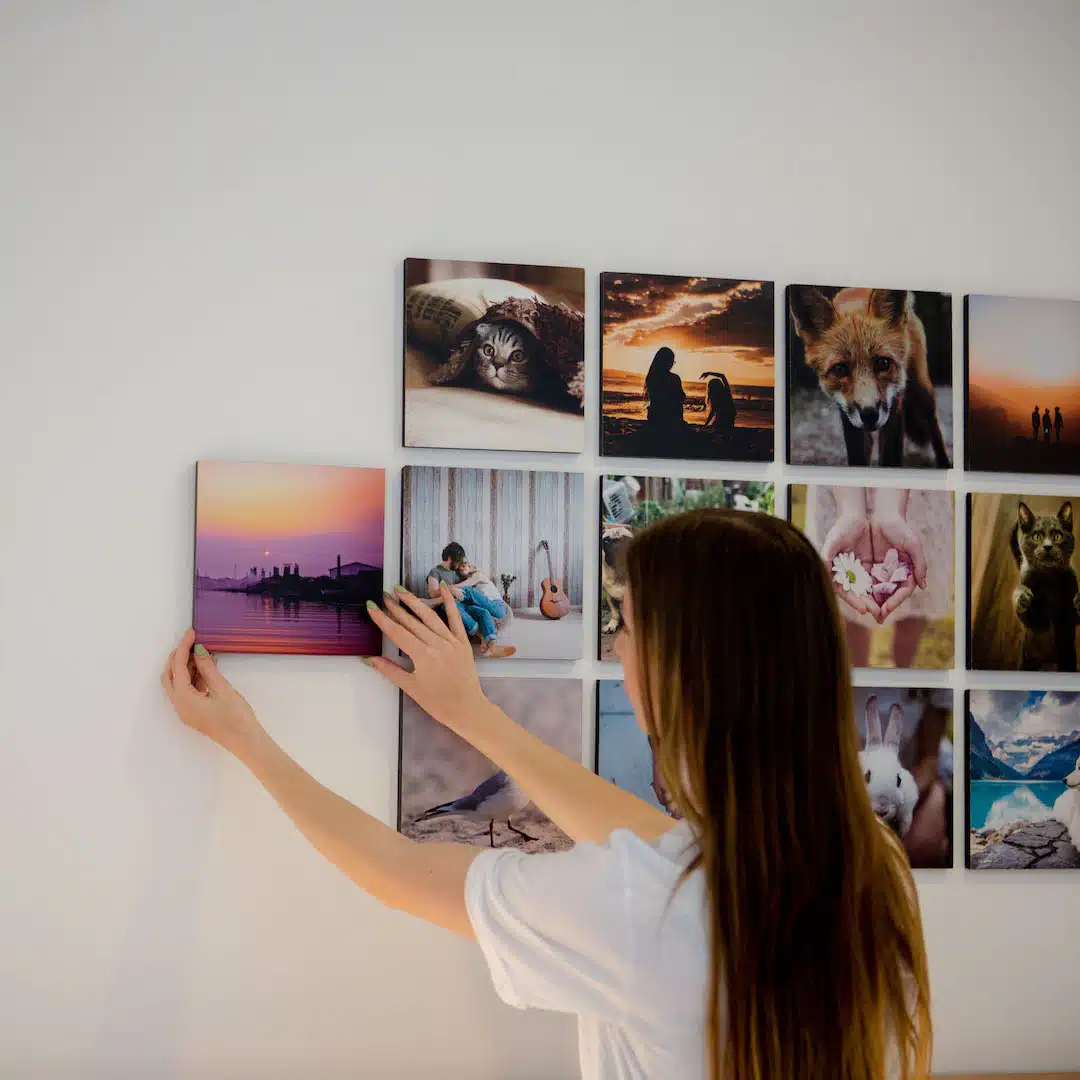
Installation Tips & Tricks
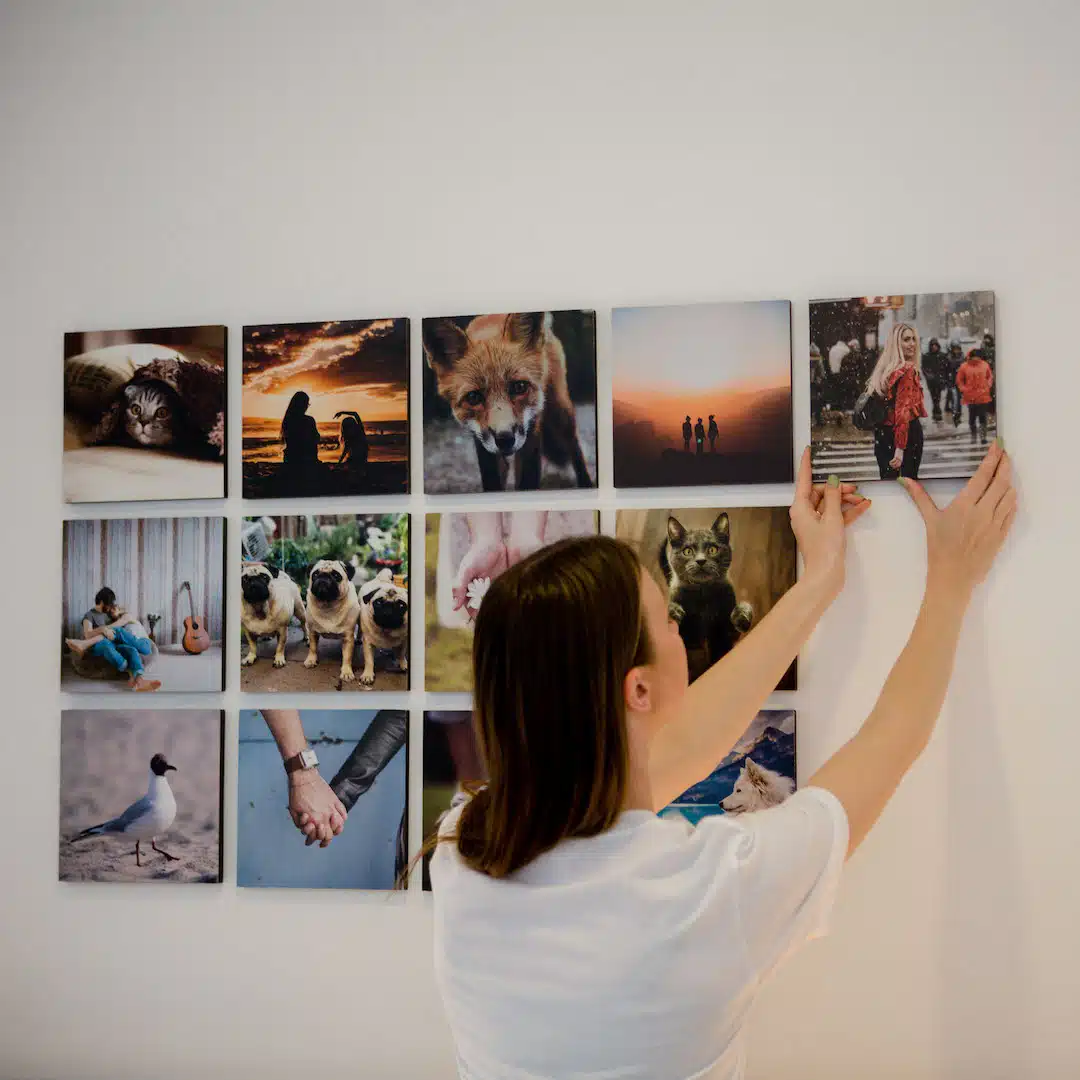
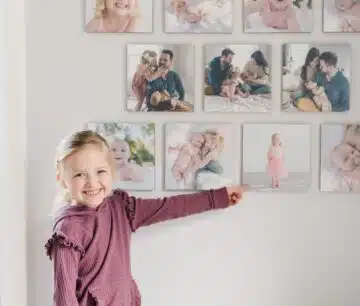
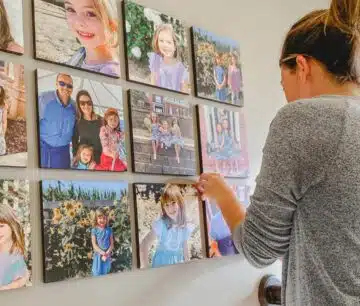
Now that you have your photo tiles and layout ideas ready, it’s time to install your gallery wall! To ensure your photo tiles are securely and properly hung, it’s important to use the appropriate hanging techniques and care for your tiles as needed. From adhesive and magnetic solutions to traditional hardware, there are several ways to hang your photo tiles, depending on the material and design.
In this section, we’ll explore some tips and tricks for installing your photo wall tiles, ensuring they look their best and stay securely in place. So, let’s get started and turn your vision into a beautiful reality!
Hanging Techniques
The hanging technique you choose for your photo tiles will depend on the material and design of the tiles, as well as the weight and size of the objects being hung. Options include adhesive, magnetic, or traditional hardware like nails and screws. When choosing the right hanging technique, consider the weight and size of the object, as well as the material of the wall.
For heavier objects, you may need to use nails, screws, or picture hangers, while lighter objects may be sufficient with adhesive strips, tape, or poster putty. Whatever hanging technique you choose, be sure to use the right type of hardware and adhesive for the material of the wall to ensure a secure and long-lasting installation.
Caring for Your Photo Tiles
Proper care and maintenance are essential to keep your photo wall tiles looking their best. To clean your tiles, simply wipe them with a dry cloth to remove dust and dirt. If your tiles are waterproof, you can also use a damp cloth to clean them as needed.
When storing your photo tiles, it’s important to keep them in a cool, dry place away from direct sunlight to prevent damage. If you plan to rotate your display, make sure to store the tiles in a safe place to prevent any accidents or damage.
With proper care and maintenance, your photo wall tiles will continue to look stunning and showcase your favorite memories for years to come.
Photo Wall Tile Gift Ideas
Looking for a unique and memorable gift idea for friends and family? Custom photo wall tiles make wonderful presents for any occasion. Whether you’re celebrating a birthday, anniversary, or holiday, a personalized photo wall tile is a thoughtful and cherished gift.
From showcasing family memories to capturing special moments, photo wall tiles are a lasting reminder of the love and joy shared between friends and a family member.
Summary
In conclusion, DIY photo wall tiles offer a personalized and affordable way to decorate your home with your favorite memories. From selecting the perfect photos and materials to choosing creative layouts and innovative display ideas, the possibilities are truly endless. With proper installation and care, your photo wall tiles will be a stunning addition to your living space, showcasing your unique style and personality.
So, what are you waiting for? It’s time to unleash your creativity and transform your empty walls into a beautiful gallery of memories and artistic expression. Get started on your DIY photo wall tile project today and create a stunning home decor that’s truly one-of-a-kind!
Frequently Asked Questions
How do you make photo tiles at home?
Create beautiful photo tiles with Mod Podge and your favorite pictures! Simply cover the tile with Mod Podge and press the photo onto the top – it’s that easy!
Create stunning memories that last a lifetime.
How to do a photo tile wall?
Creating a photo tile wall is easy – choose the best tiles, measure and upload your pictures, order and hang them using the right hanging system, create a layout, then apply light pressure to stick them onto the wall.
Finally, add any extra tiles needed for the desired look.
What materials can be used for photo wall tiles?
Create a stunning statement wall with photo wall tiles made from ceramic, aluminum, or foam – each giving you a unique look and feel!
These tiles come in a variety of shapes and sizes, allowing you to create a unique design that will make your wall stand out. You can choose from a range of colors and finishes to match your existing decor.